
Using the QGIS History Log
“QGIS provides processing logs to assist users with the execution of repeatable tasks”
QGIS is designed to allow many forms of automation which allow for the easy repeating of similar operations. It also keeps various logs for troubleshooting and for keeping detailed records of analysis steps so that an accurate record of data processing history can be easily maintained.
You try:
Goal: To explore how to use QGIS History Logs
Users can repeat and modify an executed task with QGIS History Logs. To do so, first a processing task must be executed.
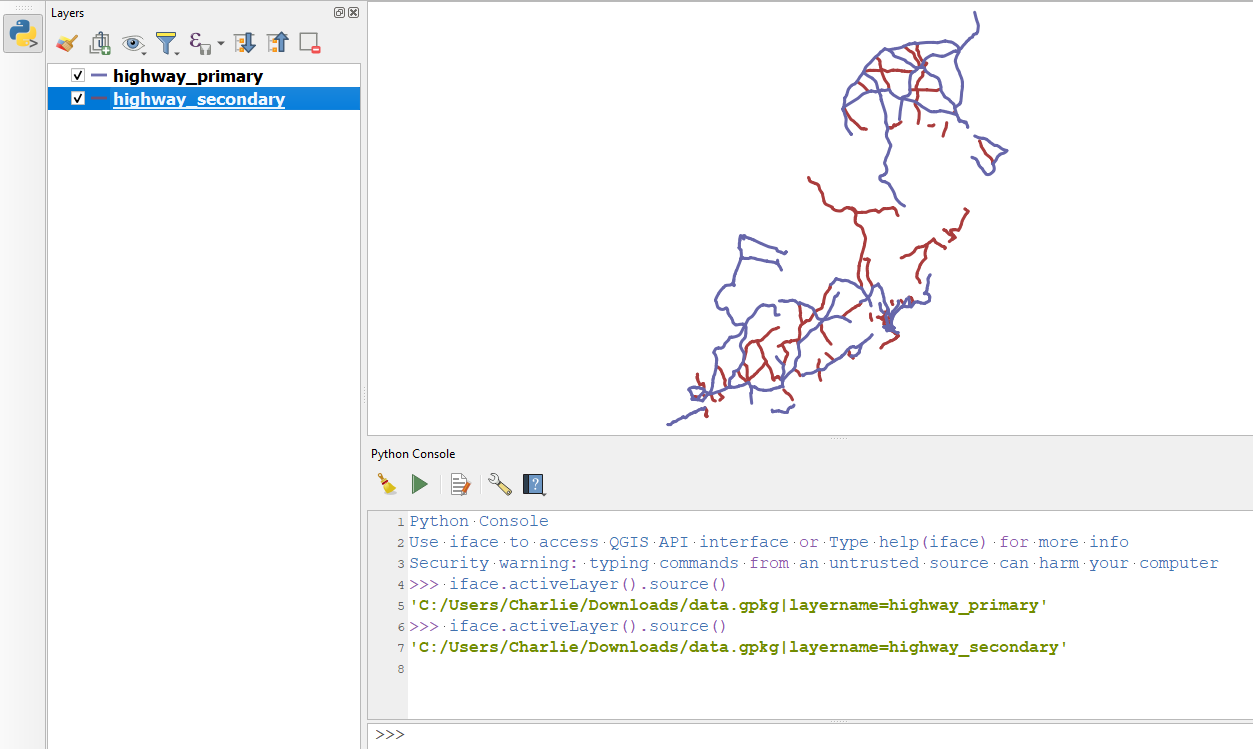
- From the exercise data, load the highway_primary roads layer
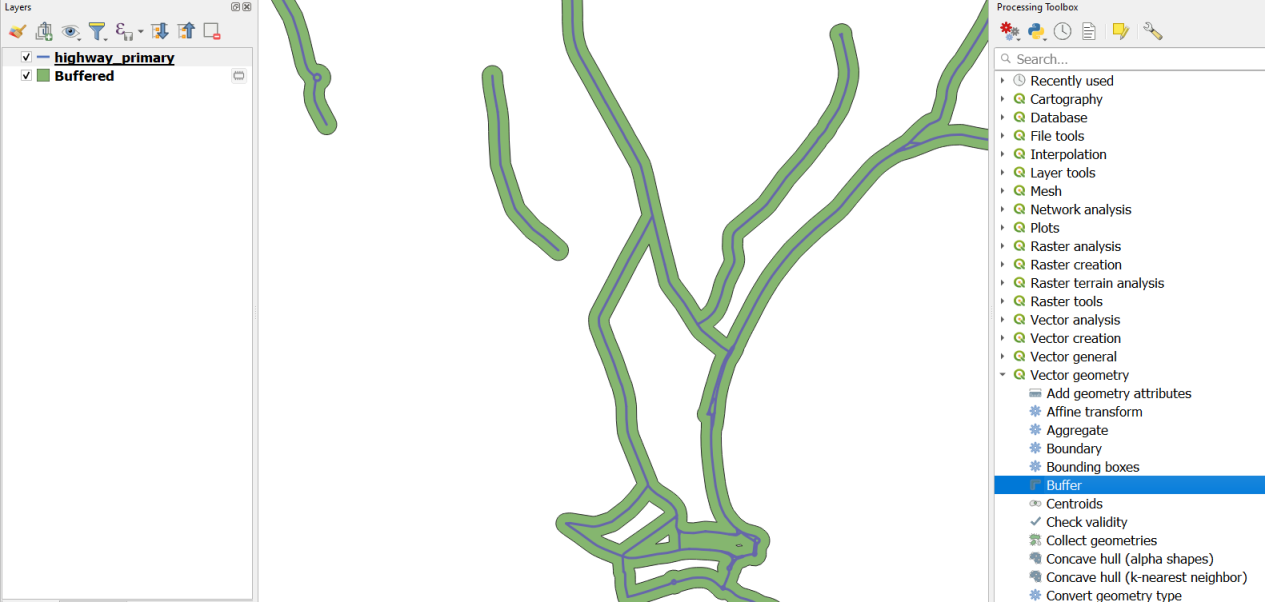
- Open the QGIS Processing toolbox and search for the buffer tool
- Buffer the highway roads layer by a distance of 50 meters and check the dissolve result option
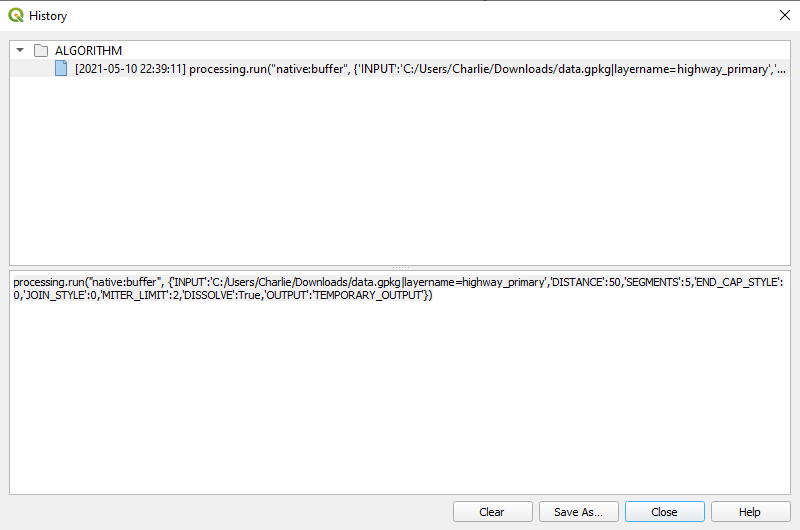
- Open the processing history dialogue. It can be accessed from the Processing>>History menu, from the clock icon in the processing toolbox interface, or by using the Ctrl+Alt+H keyboard shortcut
- Review the processing history. Note that under the algorithm section that various executed processes should be identified
- Select an algorithm to review the processing command, or double click to reopen and execute the processing tool again using the same options
More about
One of the most powerful QGIS features is the python console, which exposes the QGIS PyQGIS API directly to users. Opening the python console allows users to issue instructions to QGIS using the python programming language, and interact with various elements within the map project.
Open the Python Console using the button on the plugins toolbar, from the Plugins>>Python Console menu item, or the Ctrl+Alt+P keyboard shortcut.
Select the highway_primary layer in the layers panel, and type or paste the command iface.activeLayer().source() into the python console. Press the return key or run command button to execute the instruction. The system should return a result resembling 'C:/Users/Username/Downloads/data.gpkg|layername=highway_primary', which is the data source path of the currently selected layer.
If you were to modify that path to 'C:/Users/Username/Downloads/data.gpkg|layername=highway_residential', and then use the following command QgsProject.instance().addMapLayer(QgsVectorLayer('C:/Users/Username/Downloads/data.gpkg|layername=highway_residential', "Residential Roads", "ogr")) in the python console, it should load the residential roads layer into our project from the commandline.
Users can use this command console to execute existing commands that have been generated by the QGIS History Logs. Open the history and find the command used to execute the buffer operation in the exercise above. The command should resemble the following:
processing.run("native:buffer", {'INPUT':'C:/Users/Username/Downloads/data.gpkg|layername=highway_primary','DISTANCE':50,'SEGMENTS':5,'END_CAP_STYLE':0,'JOIN_STYLE':0,'MITER_LIMIT':2,'DISSOLVE':True,'OUTPUT':'TEMPORARY_OUTPUT'})
Modify the command to use the processing.runAndLoadResults operation, which will ensure that the output is added to your project. Try to change the operation to use the highway_secondary layer and change the buffer distance to 20 meters. The result should resemble the following:
processing.runAndLoadResults("native:buffer", {'INPUT':'C:/Users/Username/Downloads/data.gpkg|layername=highway_secondary','DISTANCE':20,'SEGMENTS':5,'END_CAP_STYLE':0,'JOIN_STYLE':0,'MITER_LIMIT':2,'DISSOLVE':True,'OUTPUT':'TEMPORARY_OUTPUT'})
Try to paste this modified command into the python console and see if it executes the buffer correctly and adds the result to your project. Do you see how you could use this functionality to iterate over multiple files and data layers to perform similar operations efficiently? Can you find a way to easily load and automate the buffering of the various road layers available in the exercise dataset?